Wednesday 9 February 2011

Tutorial 3


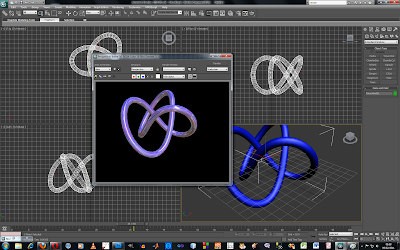
Producing a high shine metallic material: Using the torus knot from the extended primitives bar, I created a shape in the viewpoint. In the materials bar, I picked the anastropic shader and clicked on the diffuse button. In the 'maps' section, I selected a picture of bricks, which adds the picture of the bricks to the reflective map channel. I then dragged the material onto the torus knot, and you can then see the reflection of the bricks in the rendered image of the knot.


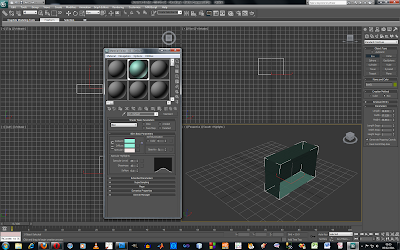
Making materials: here I used the material editing tools to make my box transparent.
Mood Board

I watched the James Bond film Goldeneye. In this film James Bond teams up with a survivor of a destroyed Russian research center to stop the hijacking of a nuclear space weapon by an agent who was previously believed to be dead. This film has plenty of action and all the typical James Bond movie scenes and characters. I here collected several screen shots of things I thought to be relevant from the film to make my mood board for Goldeneye. As you can see it is a fast paced action film with lots of explosions, cars, gadgets and guns. Some ideas I have for things to include in my animation are: An image of the golden eye, the bungee jump (that happens at the start of the film), a car race, an image of a gun shooting, a giant heeled shoe (like the one in the credits sequence of this film), and a motorbike with James Bond on it flying from a cliff. For these ideas I would need to model objects such as the vehicles and guns.

Tuesday 8 February 2011

Research Board

For this research board, I simply went online and gathered images from James Bond films. While researching James Bond I discovered that they all follow a certain formula. They all have bad guys, shooting, explosions, car chases and a girl that he wins over, and these pictures reflect that. These things will be the kind of things that I will want to put into my animation to capture the mood of a James Bond film.

Wednesday 2 February 2011

Tutorial 2


I made a rectangle shape and went to the Array tool box I was able to choose how many copies of the shape I required. I was then able to clone the shape to create lots of them. This is a useful tool for when you want to repeat a lot of the same object.


I created this coat hanger shape using the 'loft' tool. Firstly using the line spline tool I drew out the shape of the coat hanger. I highlighted the shape and in the Loft properties box clicked on the circle. This gives the shape the tubular look and makes it look more realistic.


The hole in the teapot was created using the 'Boolean' tool.


This vase shape was created using the lathe tool. Using the line tool I made a smooth line. I then made the 'pivot point' where the bottom centre of the vase would be.

Wednesday 26 January 2011

Tutorial 1


Using low poly modelling, I created this apple. Firstly, I used the sphere tool to create a shape in the viewport. Using the soft selection tool and the vertices, I altered the shape of the sphere, pulling and pushing it with the tool to give it a more realistic apple shape (as none of them are perfectly round) and an indent at the top. Then, using an 'elongated cone' shape, I made the stalk, coloured it brown, and placed it in the correct place.


Using basic shapes, I created this snowman model, with moving snow.


For this first attempt, I just used basic cube shapes to create a building.